 Febraury 10, 2019
Bookmarks, extensions, history and more - How to pull the plug on Chrome and jump right into Firefox
I recently got the 15 inch, 2017 MacBook Pro, a radical upgrade from the 3 different MacBook Airs I’ve used for the last 6 years. It’s been a wonderful new world of retina color, huge bump in screen real estate and faster operating speeds. But this is not a review of the MacBook Pro, it’s a story of how the morning after, while running my usual developer workflow (Chrome, Visual Studio Code and iTerm), my MacBook Pro started to run hot, so hot the fans started blowing loudly. I immediately checked Activity Monitor and lo and behold, Google Chrome was the culprit. I’d heard before how much RAM Chrome loves to hog and it seemed that it was gunning for all 16GB of memory that I had.
This reminded me that I’d tried several times to get weaned off Chrome for a variety of reasons. The first is that I’ve found Firefox Developer Edition to have a better user experience when it comes to developer tools. I just like the look and feel of debugging a web app in Firefox. I’m also a tad bit nostalgic about the browser I used as a kid when the internet was a new and exciting place to me. I’d also read that the new Quantum browser used up to 30% less memory than Chrome and perhaps most importantly, I like the way Firefox treats user privacy and shies away from aggressive collection of data and tracking.
That said, I’ve always found myself drawn back to Chrome because I have all my browser history, bookmarks, extensions and passwords in Chrome from years of using it as my daily browser. Every time I tried it would end up going go like so:

This time around though, I promised myself that I would make the jump and give Firefox a fair shot at winning me over. Here’s how I finally got everything over from Chrome into Firefox Developer Edition. If you’re like me and looking to try out Firefox for a bit to see if it sticks, then follow the steps below and you’ll be up and running in no time. With the exception of the last step, which I haven’t had the opportunity to try on another laptop, most of these instructions will work on any machine regardless of OS.
Let’s get cracking.
Step One: Download Firefox
The easy part - download your new browser. You can get Firefox Quantum Developer Edition here. Follow the instructions and fire it up.
Step Two: Bookmarks & History
Let’s import our bookmarks and history. This will ensure you feel more at home in Firefox. Autocomplete in the url field, all your sites just a click away and bookmarks from those sites we promised we would visit one day 😉 . To do this, click on the stacked books icon in the toolbar, select Bookmarks scroll all the way down to Show all Bookmarks (or cmd+shift+B) and click on the star icon. Select Import Data From Another Browser and choose Chrome.

Make sure you quit Chrome. You might also want to check your Activity Monitor and make sure no Chrome processes or helpers are running in the background. Now you can select the items you want to import.

After selecting the data you want, click continue and let Firefox do it’s work. Once the process is compete, you should have your cookies, history and bookmarks in Firefox.
Step Three: Extensions
The next thing is our extensions. You can open up the extensions manager in Chrome and then in your Firefox browser, search for any extensions you want to use. I found a Firefox counterpart for every Chrome extension that I intended to keep. I also used this process as a time to do some house-keeping and pull a Marie Kondo on my extensions list. You might be surprised at the number of extensions that no longer serve a useful purpose or “spark joy” 😂 . It’s also a great idea to keep extensions light, especially those that run in the background. They add to your browser’s overall load and affect how much memory is consumed. You can find Firefox "Add-ons" as they're called, here
Step Four: Passwords and Login
This step is a bit more involved but we’ve come so far and we can do it. This one was really big for me. I have dozens of variations of my password and I have come to rely on a carefully worked out system, where the browser takes care of some of them and the rest I carry in my head or delegate to social logins. This proved to be my undoing the last time I tried to move over from Chrome as I just got tired of having to reset so many account passwords.
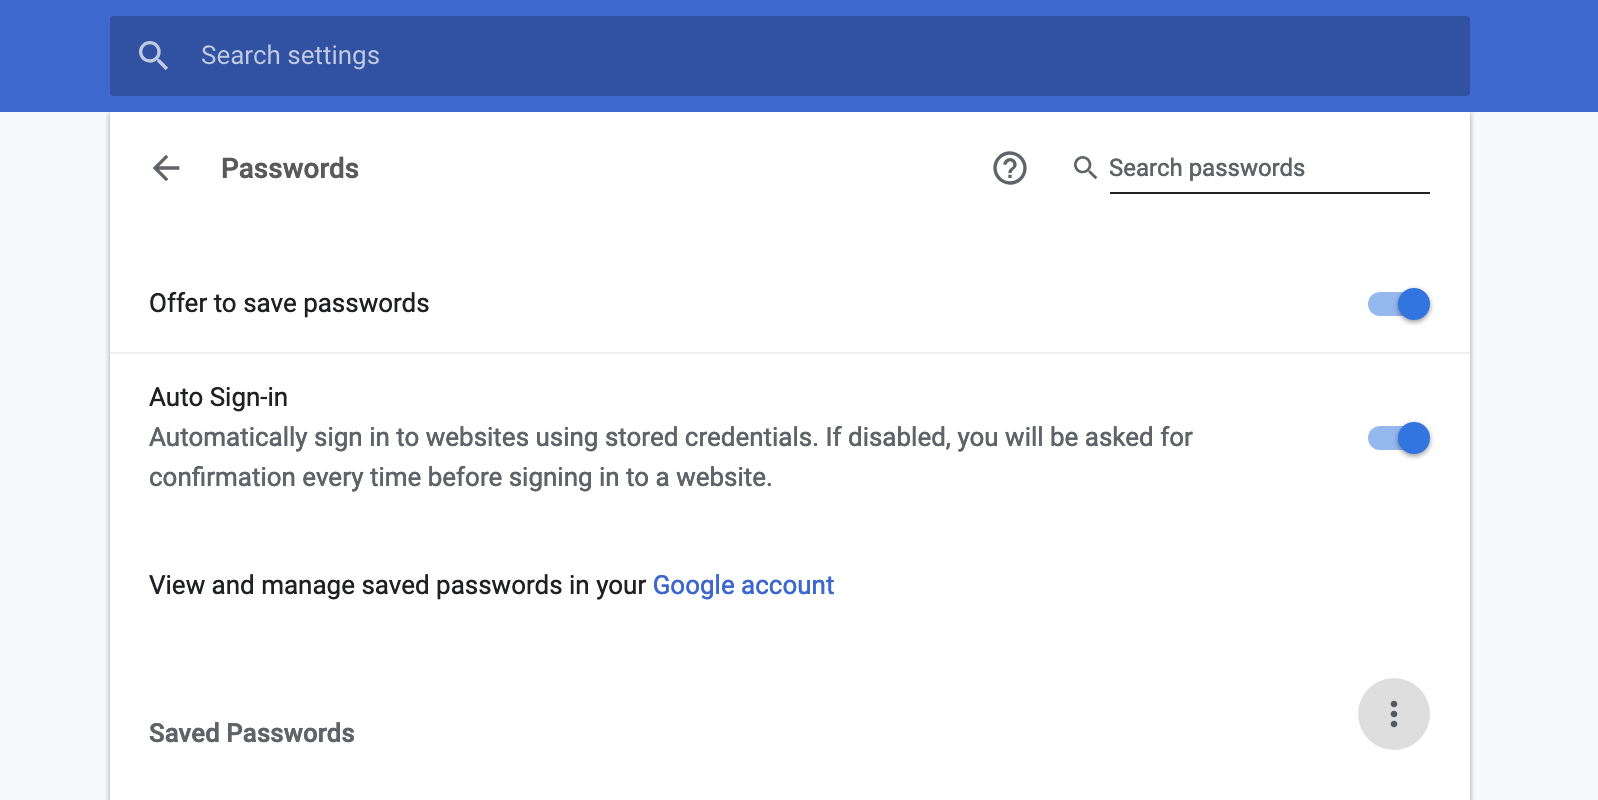
First, get your passwords exported from google in a .csv file. This can be done by going into Chrome and going into your settings. Click on passwords in the Autofill section and then click the three dot menu button and select Export passwords. Make sure to keep this file local. Don’t put it in any shared folders. It’s extremely sensitive information.
You’ll be asked to enter your computer password. Do this and choose the target local folder (see above), leave the file type as .csv and input “password” as the name of the file.
Next, you’ll need to install a command line tool called ffpass. You can find the GitHub repo here.
To install this tool, you’ll need Python 3. If you don’t have version three, you can use homebrew by running:
$ brew install python3This will also install pip3 which is the python installer. If your MacBook is setup like mine, you’ll need to change the command line aliases for both python and pip commands to point to the newly installed python3 and pip3 and not the python and pip versions 2.* which ships with MacBooks by default.
To do so, open your .bash_profile and set up some new aliases.
$ open ~/.bash_profileIn the text file that appears add these two lines.
alias python='python3'
alias pip='pip3'
Now we can install ffpass by running:
pip install ffpassIt shouldn’t take long to install, but once it does, we can now import our password.csv file’s data into Firefox . Make sure Firefox is closed and then enter the following command.
ffpass import --from /path/to/passwords.csv -d /Users/YOUR_HOME_FOLDER_NAME_HERE/Library/Application\ Support/Firefox/Profiles/91ybe9eg.dev-edition-defaultWhat we’re doing here is importing from the path where our passwords.csv file is and writing to the location where Firefox can view and consume the data. Be sure to permanently delete the password file once this command runs as this is sensitive information and shouldn’t sit around on your computer or be shared with anyone.
And that’s it! Open up Firefox again and it should feel more like the browser you’re used to. You’d still be logged out of most your accounts but the form autofill data should have you easily setting things up again with just a click. I’m hoping to use Firefox for a few weeks and see how I feel and more importantly, how my computer feels about it. So far I haven’t really missed Chrome and even with my web development, I’m finding the Firefox environment to be a welcome change. Let’s see how it goes.
How about you? Are you planning on giving Firefox Quantum a try or have you done so already? Let’s compare notes in the comments below!